Wednesday, October 3, 2012

Nacho Quiche Recipe


Ingredients:
6 corn tortillas (this is your “crust”)
7 slices of cooked bacon – cut up or chopped.  I used turkey bacon.
8 eggs
1 can nacho cheese
1 can Rotel (drained)
½ cup heavy whipping cream
2-3 green onions - chopped
Sliced jalapeƱo (I used the canned nacho kind)
The following seasonings are “to taste”.  I only added a little of each because everything already has so much flavor. 
·         Paprika
·         Cumin
·         Salt
·         Pepper
·         Garlic powder
·         Onion powder
·         Oregano

 
Preheat oven to 400 degrees. 

Spray a deep dish pie pan with nonstick spray.
Lay 5 of the corn tortillas around the edge of pie pan so they hang out the top a bit and overlap each other.  Lay the the 6th tortilla in the center.
Spread/sprinkle the chopped bacon into the pie pan (on top of your tortillas).
Beat eggs and heavy whipping cream.  Add nacho cheese, rotel, green onions and seasonings to taste.  Mix well.
Pour egg mixture on top of bacon in your pie plate.
Lay several jalapeno slices on top.

Bake 40-45 minutes (until the eggs have cooked).

Monday, May 7, 2012

Moist Almond Meal Banana Muffins

Almond Meal Banana Muffins

If you are looking for a wheat flour and cane sugar alternative, try these easy Almond Meal Banana Muffins. Be creative and try a variety of ingredients with the almond meal as your base.

If you are already used to eating whole grain foods, you will probably enjoy these. These do not have any grains in them, but the almond meal offers the rustic flavor and texture.

This recipe makes 6 small muffins.
Muffin Ingredients:
1 cup Almond Meal/Flour (You can find this at Walmart near the wheat flour and at Trader Joe's)
1/2 tsp cinnamon (Too much cinnamon will give these a bitter taste.)
1/2 tsp Baking Soda
1/2 tsp Salt (I used Kosher salt)
2 Eggs
1 Mashed Banana (Use a ripe banana for the best flavor.)
2 Tablespoons Honey (You can also use Agave Nectar)
1/2 stick butter (softened)
1/2 tsp Vanilla Extract

*Spread for Muffins:
2 - 3 Tablespoons of Honey
1/2 stick of butter (softened)

Mix dry ingredients (Almond Meal, cinnamon, baking soda and salt) in medium bowl.
In a separate bowl, whisk eggs, mashed banana, honey, vanilla and butter.
Stir the wet and dry ingredients together.
Pour batter into greased muffin pan as you normally would for muffins.

Bake in oven at 350 degrees for 17 - 20 minutes. A toothpick should be used to test. The toothpick will come out with a little muffin on it, but it should not be wet batter that is stuck on the toothpick.

*To make the spread for the muffins, mix 2-3 tablespoons of honey with 1/2 stick of butter. Make sure it's blended very well for a smooth spread. You can add more or less honey to suit your preferences.

Almond Meal Raisin Bread: No wheat flour, no yeast, no cane sugar.

Almond Meal Raisin Bread

Want a bread alternative? Try Almond Meal/Flour instead of wheat flour. This bread is easy to make. The preparation time is only a few minutes, with a longer bake time.

This recipe is similar to Irish Soda Bread.

If you like the flavor of whole grain foods and an earthy texture, you will probably enjoy this bread. There are no grains in this recipe, but the almond meal gives it the rustic/earthy flavor and texture.

This recipe is flexible enough to take in any direction. You can make it sweeter for a breakfast or snack. Or, you can can add herbs and cheeses for an appetizer or side dish. Play around with the recipe to create your masterpiece!

(See the Original recipe that I found on elanaspantry.com)
2 ½ cups almond meal/flour (Can be found at Walmart near the flour and Trader Joe's)
½ tsp Celtic sea salt (I used Kosher salt)
½ tsp baking soda
3 eggs
1 tablespoon agave nectar (I substituted with honey)
½ tsp apple cider vinegar

I added the following to the original recipe:
1 handful of raisins
2 tablespoons of butter
Sprinkle a little cinnamon on the top before baking.


Combine almond meal, salt and baking soda.
In a separate bowl, whisk the eggs, then add the agave (or honey) & vinegar.
Mix the wet and dry ingredients together.
Form the "dough" into a ball. Add a little more almond meal if it's too wet to form a ball. Cut a large "X" on the top - but not too deep. You can carve any shape into the top.

Bake at 300 for 45-55 minutes on bottom rack until a knife comes out clean.
Cool and serve.


Our family liked it with butter and honey on their slice. 
This recipe is a bit crumbly, but the flavor is good. Mine may be a bit crumbly because I added a bit more of the almond meal and raisins.

Monday, March 19, 2012

Recipe for Kale Salad - Sweet and Spicy Superfood

"Kale or borecole is a form of cabbage (Brassica oleracea Acephala Group), green or purple, in which the central leaves do not form a head. It is considered to be closer to wild cabbage than most domesticated forms.  Kale is very high in beta carotene, vitamin K, vitamin C, lutein, zeaxanthin, and reasonably rich in calcium. Kale, as with broccoli and other brassicas, contains sulforaphane (particularly when chopped or minced), a chemical with potent anti-cancer properties.   Along with other brassica vegetables, kale is also a source of indole-3-carbinol, a chemical which boosts DNA repair in cells and appears to block the growth of cancer cells.  Kale is also a good source of carotenoids."  Source: Wikipedia.org

Kale has a stronger flavor than spinach leaves.  You definitely know you are eating a plant.  I like it, but people that do not normally eat many vegetables may not like it.  Kale leaves are dry when you eat them raw compared to lettuce or spinach.

Ingredients
1 bunch of fresh kale (Chopped and rinsed.  Do not cook it.)
1 can of black beans (drained and rinsed)
1 can of Rotel (drained)
1 - 2 handfuls of walnuts
1 - 2 handfuls of raisins
2 Tablespoons of lime juice
Salt and Pepper to taste

Mix all of the ingredients in a large bowl and enjoy!  Serve cold.

Variations to try: Dried cranberries, chopped apples, fresh tomatoes, artichoke hearts, other nuts and seeds, balsamic vinegar.

 I do not use salad dressing with this.  There are enough flavorful ingredients. 

Wednesday, March 7, 2012

Recipe for Arroz con Pollo: Tex-Mex Style Spicy Rice with Chicken

Arroz con Pollo (Rice with Chicken)

This is a Tex-Mex (Texas - Mexican) style dish.  As you may know, Mexican style food varies greatly throughout the United States.  This is a common meal in many homes and some restaurants in Texas.  You will find that there are some variations to this dish.

Serve with refried beans and tortillas. 


Ingredients:
4 boneless chicken breasts cut into pieces/chunks.
1 cup uncooked rice
2 cups of water
1 - 10 ounce can Rotel (diced tomatoes with chilies) - Do not drain.
1 - 8 ounce can tomato sauce
1 - 15.25 ounce can of corn - Do not drain
1/2 - 1 Tablespoon Cumin powder
1/2 - Tablespoon Garlic powder
1/2 - 1 Tablespoon Onion powder
1/2 -1 Tablespoon Chili powder
2 Teaspoons Salt (or to taste)
Black pepper to taste
2 - 3 Tablespoons of oil

The spices listed above do not need to be exact.  The more you use the stronger the flavor.

Optional Garnish: Chopped green onions, cilantro leaves, shredded cheddar and Monterrey jack cheese.

For this amount of ingredients you need a very large skillet.  You can easily adjust the quantity of ingredients to fit your needs and your cookware. 

Heat 2 - 3 Tablespoons of oil in skillet.
Brown the chicken in the skillet.
Slowly add all other ingredients.
Bring the mixture to a slow boil.  Stir occassionally.
Once your mixture reaches a boil, turn the heat to a very low setting, cover the skillet and let it simmer.
Simmer for 30 minutes or until the rice is soft and the chicken is cooked all the way.  Stir occassionally.

The mixture will thicken as it cooks.

 
Up Close Picture of Arroz con Pollo

Friday, February 24, 2012

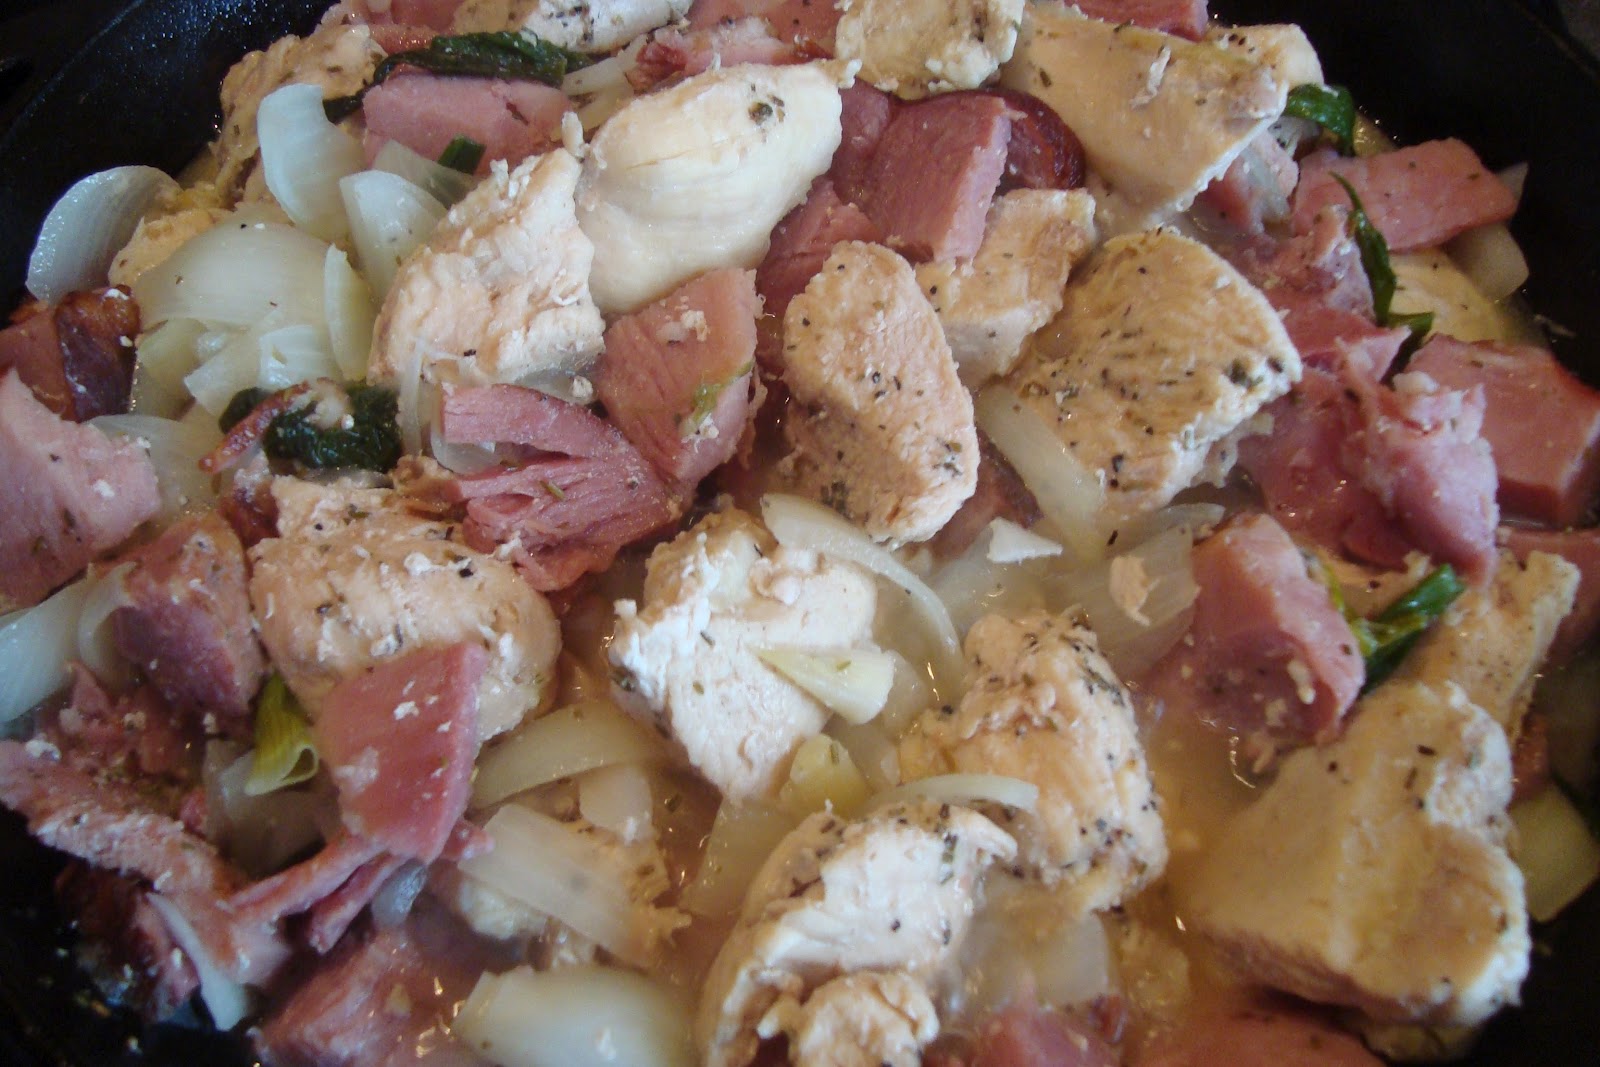
Recipe for Rosemary Chicken and Smoked Ham with Cheese Fondue Topping

 
My goal for this dish was for something similar to Chicken Cordon Bleu in a skillet.  Although it didn't turn out quite the same, it's still quite good.

The smoked ham helps add a wonderful flavor to this dish, along with the rosemary and cheese fondue.

This entire recipe is flexible enough to alter to your taste preferences and for what you have available to you.


Ingredients:
(The quantity of meat in this recipe can easily be reduced.)
3 pounds of chicken breast (cut into pieces)
1 1/2 pounds smoked ham (cut into pieces)
1 - 2 tablespoons of rosemary
1/2 - 1 tablespoon of black pepper
1/2 - 1 tablespoon of red wine vinegar
1 yellow onion (cut)
4 green onions (cut)
1 package of Cheese Fondue (you can make your own too)


You can use leftovers to make this dish.  I had on-hand a 3 pound bag of frozen chicken breasts.  I also had on-hand a 1.65 pound package of smoked ham that was originally purchased for another dish that I never made.  For this recipe you will need a very large skillet to fit it all in!

The ham in this recipe is already cooked, so start off with the chicken.  Thaw the chicken if it is frozen.  Cut the chicken in half two ways for smaller and thinner pieces.

Add the chicken, rosemary and pepper to your skillet.  Brown the chicken on both sides.

Next, add the ham pieces, red wine vinegar and onions.

Cover and simmer until the chicken is cooked all the way through.

Melt the cheese fondue according to the package's directions, or you can make your own from scratch.  I place mine in a small pan on the stove to melt.

I did not add the cheese fondue to the meat in the skillet.  Each person simply topped their own so they got the amount they wanted.  Cheese fondue has somewhat of a strong flavor for some people, so not everyone will want it on their chicken and ham. 

This dish was served with cream and honey biscuits and rice.  It would also be great with a crusty bread and couscous.


Tuesday, February 21, 2012

Recipe for Homemade Dog Treats

Our dogs absolutely love these!

Ingredients - Use organic & whole grain when possible
1 - 15 ounce can of pure pumpkin
3 eggs
2 Tablespoons of honey
6 heaping spoonfuls of peanut butter
1/2 teaspoon of salt
1 teaspoon cinnamon
3 1/2 cups of flour
1 cup of oats

Preheat oven to 350 degrees

Mix the wet ingredients together first (pumpkin, eggs, honey and peanut butter).

Add the salt, cinnamon, flour and oats to your wet mixture.
The dough will be thick and sticky.  At this point, I use my hands to blend and knead the dough.

Place the dough on parchment paper and roll to a approximately 1/4 inch thickness.  I have found that if I let the dough rest for about 5 minutes, it will not be as sticky and is easier to work with.

Use a cookie cutter or knife and cut your dough.  Place dog treats on an ungreased cookie sheet.  I line the cookie sheet with parchment paper.

Bake for 30 - 35 minutes or until hard at 350 degrees.  Turn the dog treats over after the first 15 minutes of baking. 

I have made these several times.  Each time I make them our dogs can smell them and start getting excited while they are still in the oven.  I have given some away to friends and family too.  Everyone is surprise at how much their dog enjoys these treats.  Don't be surprised if your dog lures you to where you keep their treats to get you to give them more!

Friday, February 17, 2012

Recipe for Nacho Cheese Chicken Soup

This nacho cheese chicken soup is fairly quick and easy to make.

Ingredients
1 - 15 ounce can nacho cheese dip
1 - 32 ounce container of chicken broth
2 - 12.5 ounce cans of canned chunk chicken (You can substitute with leftover chicken meat.)

Garnish - 1 green onion and / or cilantro leaves.

Whisk together the nacho cheese dip and chicken broth in a pot on medium heat.  Then, add chicken.  Heat to desired temperature, garnish and enjoy!


Wednesday, January 11, 2012

Spaghetti Squash Chicken Alfredo Recipe

I love pasta, but I was very excited to find a substitute for some of my pasta dishes.  It will not replace all pasta, but it offers a great alternative to some of your simple pasta dishes.

Spaghetti Squash is a winter squash that contains many nutrients and is low in calories. 


Ingredients
1 Spaghetti Squash
1 Rotissarie Chicken (remove the skin and debone)
1 Jar Alfredo Sauce
1 Package frozen broccoli florets
1/4 - 1/2 Cup Grated Parmesan Cheese (for topping)
Black Pepper to Taste

Cut the Spaghetti Squash in half (I cut it lenghwise), scoop out the seeds and discard.  Place both halves cut-side down on baking sheet.  Bake in preheated oven at 350 degrees for 1 hour.

While the squash is baking, debone the rotissarie chicken and cut into pieces.

Steam the frozen broccoli.

After the squash has baked for an hour, remove it from the oven and use a spoon to remove the squash from the outter peel.  It will look a bit like spaghetti noodles as you scoop it out.  Discard the outter peel.

Mix together the squash, chicken, broccoli and alfredo sauce.  Place it in an oven safe dish (either a cake pan or casserole dish).  Sprinkle the parmesan cheese and black pepper on top.  Place the dish in the oven at 350 degrees for another 10 - 15 minutes.

Enjoy!

Tuesday, November 8, 2011

Recipe for a Tasty and Quick Breakfast: Pancakes, Strawberries, Chocolate Fondue and Whipped Topping

To make pancakes, chocolate fondue, homemade whipped topping and fresh strawberries for breakfast may sound more elaborate than it really is. 

For the pancakes, I used Krusteaz buttermilk instant mix (the kind that you just add water).  The instructions are on the package.  I usually add a couple dashes of cinnamon and a teaspoon of vanilla extract.

The chocolate fondue is also instant - just melt in the microwave and enjoy.  Swiss Knight Imported Fondue Au Chocolat (7 oz container available at Walmart in the deli/cheese area).

Fresh strawberries rinsed and the stems removed.

For the whipped topping, I used 1/2 pint of heavy whipping cream, 6 heaping spoonfuls of powdered sugar and about 1 teaspoon of vanilla extract.
  • Place bowl and beaters to your mixer in the freezer for several minutes to get them really cold.
  • Pour the heavy whipping cream into your chilled bowl and mix until it starts to thicken.
  • Add the powdered sugar and mix some more until you start to see ripples or waves.
  • Add the vanilla extra and mix some more until you are able to lift the beaters and some of the whipped topping will form peaks.
You can use pre-packaged whipped topping, but homemade tastes so much better and it's very fast and easy to make.

Monday, October 10, 2011

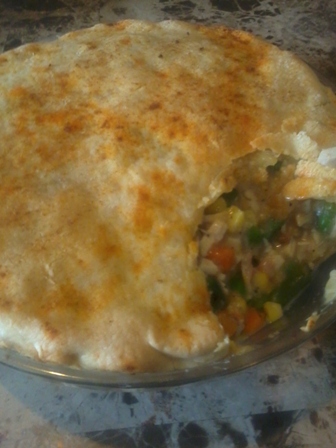
Recipe for Excellent Chicken Pot Pie - Easy to Make!


Chicken Pot Pie

This pot pie is very easy to make and tastes wonderful!
Ingredients:
1 rotisserie chicken (pre-cooked from your grocer’s deli)
1 pound bag of frozen mixed vegetables
2 cans of Campbell’s Cream of Chicken soup
1 package of 2 refrigerated pie crusts (near the cookie dough in your grocery store). 
¼ cup of water
¼ teaspoon garlic powder
¼ teaspoon onion powder
¼ teaspoon dried rosemary
¼ teaspoon salt
½ teaspoon coarse ground pepper


Chicken mixture before top crust.

A little paprika sprinkled on top of crust.

My seasonings are rarely measured.  I tend to pour until it smells good.  Use less or more of the seasonings based on your taste preferences.  You can add just about any seasoning you like with chicken and vegetables to this.

Preheat oven to 375 degrees.

Pull the chicken meat off of the bone and chop as needed to small pieces.
Mix chicken, Cream of Chicken, water, frozen vegetables and seasonings in a medium to large bowl.


Right before going into the oven.


Place 1 of the refrigerated pie crusts on the bottom of an ungreased, deep dish pie plate.
Pour your chicken mixture into your pie dish.
Place the other pie crust on top and seal the edges.
Sprinkle paprika on the top pie crust.

Bake for 50 minutes to 1 hour until done.


A great variation would be to use smoked turkey legs instead of chicken. 


No Leftover's With This Dish!


Monday, October 3, 2011

Recipe for Celery - Mushroom - Onion - Parsnip - Apple Soup

Soup with Celery Onion & Parsnips
We juice lots of fruits and vegetables for breakfast and lunch.  Today, I made a quick and easy soup with some leftovers.  Many of my recipes are based on odds and ends we have on hand in the pantry or frig. 

The ingredients may sound a little odd, but they work well together.  It cooks up fast, meaning the vegetables soften quickly.  Because of the sweetness of the parsnips and apple, I chose White Zinfandel and cinnamon as 2 of the ingredients.  Celery is great for working well in just about any flavor direction you choose.  This soup isn't sweet like dessert, but is more savory with the earthy flavors of the cumin and rosemary.

I garnished it with provolone cheese and served pumpernickel bread on the side.

Ingredients
1 entire package of celery chopped (even the leaves)
3 parsnips, peeled and chopped
1 yellow onion chopped
1 Fuji apple, peeled and chopped
32 ounce container of Swanson organic vegetable broth
2 packages of Lipton Mushroom Onion soup mix (the dry powder kind)
Couple shakes of Lea & Perrins Worcestershire Sauce
1/4 cup to 1/2 cup White Zinfandel wine
1/2 tablespoon Mustard powder
1/2 teaspoon of Garlic powder
Couple shakes of Cumin powder
Couple shakes of Cinnamon powder
Couple pinches of dried Rosemary
1/2 teaspoon of salt or to taste
1/2 teaspoon coarse ground pepper or to taste
1/2 tablespoon extra virgin olive oil

Chop the onions first and saute in your pot with the olive oil and pepper.  Add your ingredients into the pot and boil just until soft (approximately 20 minutes).

Garnish with provolone cheese.
Goes well with pumpernickel bread.

Wednesday, September 21, 2011

Great Smoked Pork Shoulder Butt for Pulled Pork - My first time recipe!

Pulled Pork (before bbq sauce)
There are not many meats that I enjoy, but the pulled pork I made is great!  This was my first time smoking a pork shoulder and I'm so excited that it turned out.  It looks a bit like shredded pork, so I may need to adjust the final cooking temperature, but I'm very pleased with the texture and taste.  The picture on the left is the pan of pulled pork beofore adding barbeque sauce.  I think anytime I try something new that turns out well, I feel quite proud of myself.

I decided to let each person add barbeque sauce to their sandwhich instead of me adding it to the entire batch in case we wanted to make burritos or some other dish with the meat in a couple of days.  If it's drenched in barbeque sauce it limits our options for other seasonings for other dishes.

We used two different kinds of ciabatta bread rolls for the pulled pork sandwhiches: onion poppy and plain.  Besides the Sweet Baby Ray's barbeque sauce, we also had sliced provolone cheese, pickles and mild banana peppers for the sandwhiches.  As the side dish, I attempted baked beans.  However, the beans never softened to where they should have been after so many hours.  I'll add more water and cook them some more today.  The flavor was good - just too-hard beans to actually serve them.

Recipe / Instructions for Pulled Pork

Pork Should With a Rub
 Trim the pork shoulder as needed.
Apply your rub.  Here's what I used:
  • Season-All Salt
  • Cayenne
  • Chipotle
  • Black Pepper
  • Cumin
  • Thyme
Inject your pork (optional).  I must confess that I fully planned to inject this pork, but I accidently broke the device before I could.  OOPS!  I was trying to put the part that goes inside (I'll call it the handle/pusher) into the syringe and the end that I was pushing on just snapped off.  I guess that was a wee bit too much force.  Being the brainiac that I am, I thought maybe a turkey baster would work.  So I cut a few holes around the pork, sucked up my mystery juice (juice & leftover rub) and tried to "inject" it into the pork.  I don't recommend this technique.  The hole is too large and your mystery juice will ooze right back out.  At least now I know, and if you didn't already know, there you have it!


Pork Shoulder & Backed Beans
 My smoker was at 300 degrees when I placed the pork shoulder in it.  It went in at 8:15 am.  I used a chimney to light the coals, but I plan to get a small blow torch device.  Not the kind a welder uses!  I'm afraid I'm going to start a fire with that chimney.  I'd rather have a little more control when lighting the coals.  When those little pieces of lit paper start flying around my yard, I tend to get freaked out.


Smoker
 In the picture on the right, you can see the top of the smoker (barrel) there are holes and there are valves at the bottom.  Throughout the day, I open and close different holes or valves to maintain a consistent cooking temperature.  I have a thermometer in one of the top holes as well as one that sits on the rack.  The top one runs about 15 degrees cooler than the one of the rack because it's farther from the heat source.  It gives me a quick guage without having to open and close the lid.  For the more serious smokers, there are much better gauges on the market.  Inculding those with a fan system to adjust your temperature and WiFi so that you can check on it and control it from your cell phone.

4 hours of smoking
4 hours of smoking
After four hours inside the smoker, it was time to wrap the pork shoulder.  I pulled it out and place it on 3 large sheets of heavy duty aluminum foil so that it could be triple-wrapped.  It's best to have several layers of heavy duty foil if you are adding a liquid in case you have any small tears in your foil.  If it tears, all of your liquid could spill out and onto your coals at the bottom.


Before closing the foil around it, I added liquid. 
  • Apple Juice - I used my juicer and juiced several large Fuji apples.
  • Honey
  • Cayenne Pepper
  • Chili Powder
  • Balsamic Vinegar
    Resting Pork shoulder
    
I closed the foil around the pork shoulder and liquid, then place it back in the smoker until it reached about 190 - 200 degrees.  Some areas of the pork were at 190, while other spots were near 200.  It was around 2:00 pm when it reached this temperature.  So, the total time inside the smoker was around 7 hours for this nearly 10lb pork shoulder.  I let it rest outside of the smoker for several minutes and the temperature increased to 205.


Smoked Pork Shoulder

While wearing gloves so that I didn't burn my hands, I pulled the pork apart.  The fat and most of the outer "bark" (really dark edges) went aside and were not included in the pan of pulled pork.  Some of the bark and fat went into the pot of beans, the dog got a couple of pieces, but most went into the trash.  After smoking there was very little fat as it all rendered off.

In the picture on the left, you can see the apple juice liquid.  I mixed that with some Funny Farm BBQ sauce and honey, then added it to the pan of pulled pork.  It's not an overpowering flavor, but it's flavor that we enjoy and still leaves us options to prepare other dishes with the left-overs.

My first go at smoking a pork shoulder was a great adventure!  I'm proud of myself and happy that the kids and my husband like the taste.  I still need to work on the baked beans, but overall, it was a wonderful experience.


Monday, September 19, 2011

Recipe for Smoked Drumsticks Wrapped in Bacon and Rolled in a Hot Wings Sauce


Right before they went into the smoker.

Quick Instructions (details below)
Remove skin from drumsticks.
Apply a rub to the meat. 
Wrap a piece of bacon around each drumstick.
Smoke until done.  I kept the temperature of the smoker around 325 degrees as consistently as possible.  They were done in an hour.  Be sure to test with a meat thermometer.
Roll in a hot wing/buffalo sauce and serve!


 The Rub
I didn't measure, I tend to pour until it's the right color and scent.  They are listed in order of amount used:
Season-All Salt
Cayenne Pepper
Crushed Black Pepper
Ground Cumin
Garlic Powder
Thyme
Paprika


Right after smoking.

Put your rub on the drumsticks. Then cover each one with a strip of bacon.  I used a strip of bacon since I removed the chicken skin.  Since many people do not like the skin, I replaced it with bacon.  It holds in the moisture, enhances the flavor and offers a nice texture to bite through.
 
Smoke your seasoned, bacon-wrapped drumsticks until done.  I tried to maintain the smoker's internal temperature as close to 325 degrees as I could for the hour it took to cook the drumsticks to 170 degrees.  They only took about 1 hour to reach this temperature.


In the hot-wings/buffalo sauce.

The Hot Wings Sauce
The ingredients are an adaptation of what I found on the Louisiana Hot Sauce website.
1 stick melted butter
1/2 cup Louisiana Hot Sauce
1 tablespoon Honey.

After the drumsticks came out of the smoker, I rolled them around inside of the pan of my hot wings mixture.  It's not a super thick hotwing sauce, but it did the trick!


This is all that was left.

I didn't have a chance to get a good picture to show you the plate of the finished drumsticks.  As I was pulling them out of the sauce, 5 teenage boys and my husband swooped in and gobbled them up.

They say they were great!  One of the boys said "You combined my favorite ingredients: chicken, bacon and buffalo sauce!"

We went to a BBQ cooking class - taught by MooCow BBQ World Championship BBQ Team


Over the weekend my husband and I attended "Make It Take It BBQ Drum Class" at MooCow University in Belton, Mo which is a suburb of Kansas City.  It was great fun and I left feeling excited to start cooking new dishes!

We started the day with hands on information for selecting and trimming meats with a focus on brisket, pork butts and ribs.  I did learn a great technique for chicken too!  A whole chicken can cook more evenly by removing the backbone and sternum so that it can lay flat.  We also gained great information on rubs, injections and sauce.

Selecting and Trimming Brisket

 Besides the great information, one of my favorite parts of the class is that we (my husband) made our smoker that we got to take home as part of the class.  I often say "we" did something, but if it involves tools, you can be sure it was actually my husband doing it and not me!  While the meats were smoking, everyone got to work on their own smoker.  Everyone received a 55 gallon drum, parts for the valves and handle, a rack and a basket to hold the coals.
Selecting and Trimming Pork Shoulder/Butt
We ate, and ate, and ate!  As each of the meats came off of the smokers throughout the day we tasted them.  By the time the ribs were ready I was full!  We started with chicken and beans.  Then we had brisket, pulled pork and ribs.


 There were about 17 people in the class from several different states.  Some are on competitive BBQ teams and others, like us, were there to learn from the masters other ways to make great food at home.


Selecting and Trimming Ribs


Since the class, I've been experimenting!  Of course, everyone in the house is excited that I'm excited about preparing smoked foods!  So far I've only smoked chicken and cabbage.  Well, I actually did smoke apples.  No one in the house really liked them though with the smoke flavor.  They were expecting apple pie flavor - simply sweet and a little spicy with cinnamon.  The smoke flavor overpowered the sugar and spice.  I started with lesser expensive foods in case it turned out badly.  Tomorrow, I'll smoke a pork shoulder.  Crossing my fingers it all turns out well.


I'll share recipes through my blog as well as confess anything that didn't turn out so good. I'd love to hear any great recipes and tips you use when smoking foods.
 
If you'd like more information about MooCow BBQ their website is http://www.moocowbbq.com/.


Friday, September 16, 2011

My approach to life is like cooking. Bread pudding for breakfast!

My approach to life is very much the same as my approach to cooking.  With both I have learned the following:
·         Work with what I have, if I cannot get everything I want.
·         Listen to the advice of others that have done it before.
·         There is more than one way to make something turn out good – if not great.
·         Don’t be afraid to try something new.
·         Be able to laugh at my mistakes.
·         Share joy with those around me.

For breakfast we may have eggs and philosophy.  Dinner is often experiments of flavor and the pleasure of company with laughter, conversation and never enough chairs for everyone.  We laugh sometimes because throughout the years it seems that people know when we eat dinner and just happen to show up.  So I try to make more than enough food for any unexpected guests that might arrive.

I hope that you will “show up” often, and enjoy the recipes and thoughts that are shared. 

This morning we actually had a bread pudding of sorts served with homemade whipped topping, cream cheese and hot cocoa.  A lot of the dishes I make are based entirely on what I have on hand.  Today, I had “must-use-today” French bread and a little bit of heavy whipping cream that also needed to be used before going bad!

Recipe for Bread Pudding [of sorts]:
1 loaf of French Bread (any bread will work)
2 eggs
1 – 1½ cups milk (depending on the size of your loaf. You need just enough to moisten the bread)
1 Tablespoon cinnamon
1/2 Tablespoon vanilla extract
¼ cup brown sugar
Handful of raisins

Pull bread apart with your hands and toss into a 9x9 or similar size oven dish that has been lightly coated with Crisco or Pam. Mix eggs, milk, cinnamon, vanilla, brown sugar and raisins together in a separate bowel then pour over bread pieces. Stir the mixture, then put in oven (preheated to 375) for 45 minutes or until bread pulls away from the sides of the dish. 

Recipe for Homemade Whipped Topping
1 – 2 cups heavy whipping cream
½ - 1 cup powdered sugar (can use regular sugar)
1 tablespoon vanilla extract

Place glass bowl and beaters to your electric mixer in the freezer for a few minutes to get them cold.  Pour heavy whipping cream in bowl and beat with electric mixer until it starts to thicken a bit.  Add sugar and vanilla. Dip your finger in the bowl to taste so you know you have enough sugar for your liking. Continue mixing until it is the consistency you enjoy.